Arduino IDE Setup For LED Strips
Before you can use your Arduino you’ll need to do just a bit of setup. This guide will walk through the basics of getting your Arduino connected and ready for programming. First, you’ll want to go here https://www.arduino.cc/en/Main/Software scroll down, and download the version right for your computer. There is a web browser based version of the software but I recommend downloading and installing the program.
Next click through the installer until it is finished and make sure your Arduino is pulled in. Then we need to find what COM port your Arduino is connected to. One easy way to do this is by opening the device manager. Some “off-brand” Arduinos are made with a different USB-to-Serial converter (which allows your Arduino to talk to your computer) called the CH340G. If you have this chip your Arduino will work fine but you’ll need to install a driver to get it working. If you run into this issue check out this tutorial. https://www.youtube.com/watch?v=Ix4t-_RZ7NI When you look in the device manager your Arduino might be listed as “USB Device”. A good way to determine which entry is your Arduino is to unplug it, see which one disappears from the list, and then plug it back in.

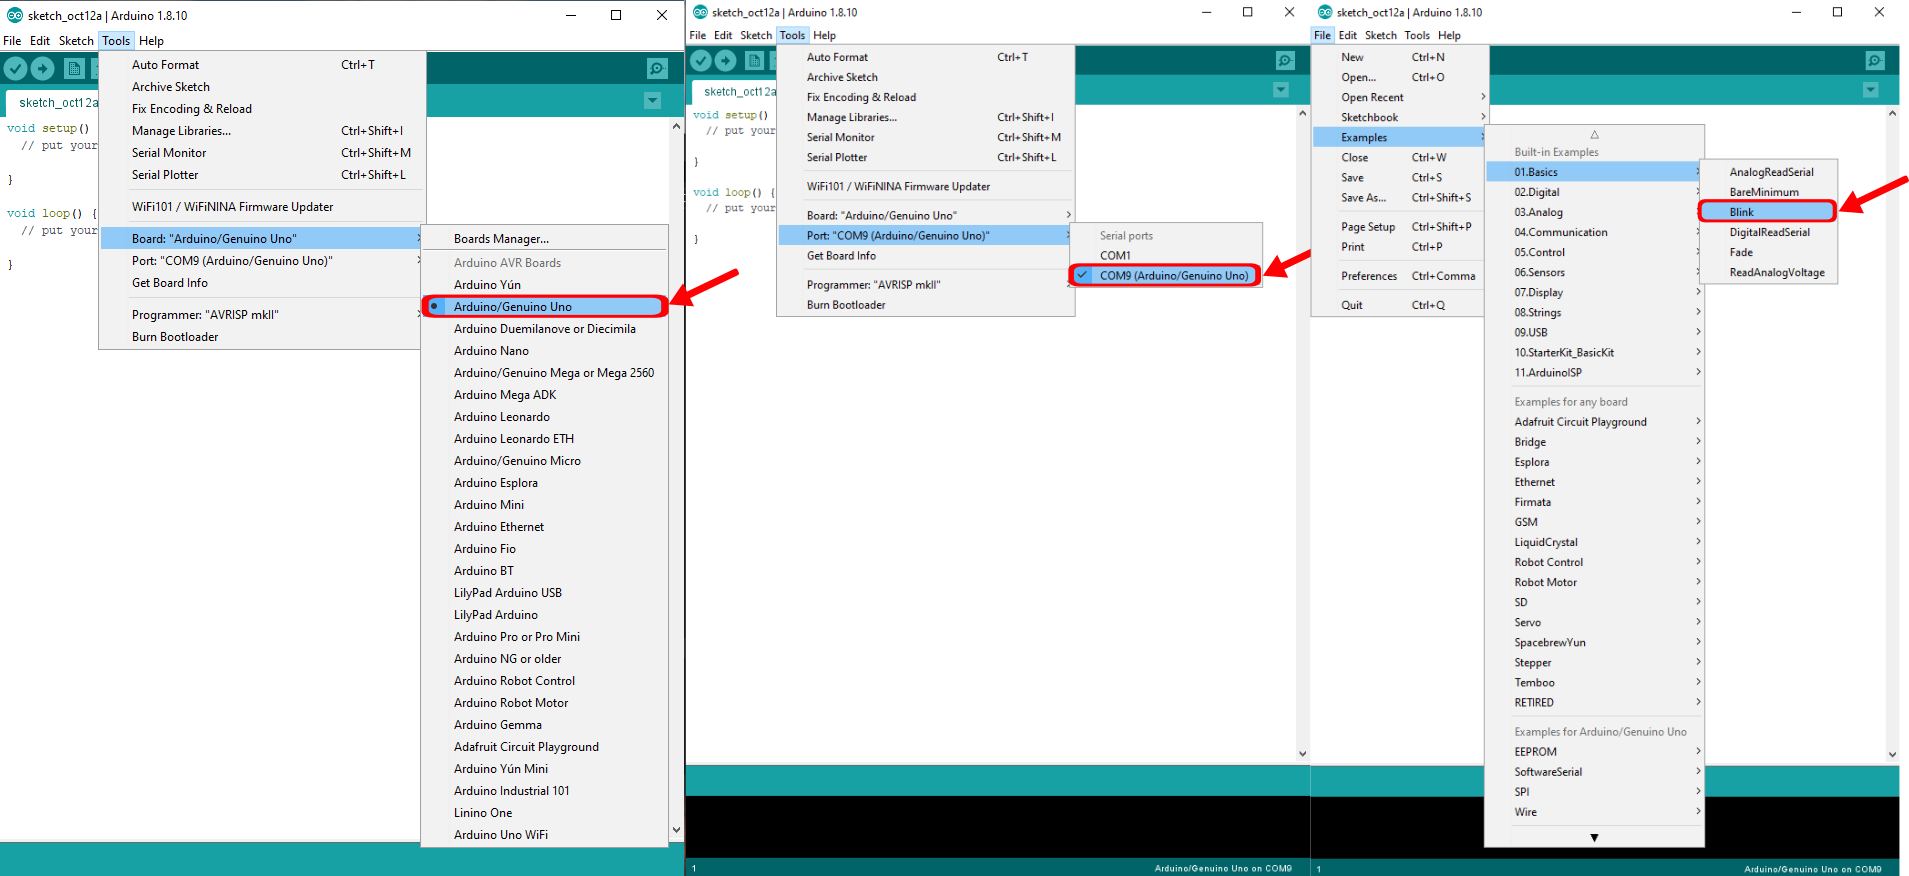
Now that we’re in business, go ahead and open up the Arduino program. First thing, go to Tools->Board and select the correct board. Then go to Tools->Port and select the COM port we found earlier from the device manager. This tells the Arduino program where your code should go. Lastly go to File->Examples->Basic->Blink to open the blink example. This example toggles the on-board LED every second. This is an easy way to determine if the board is working correctly.
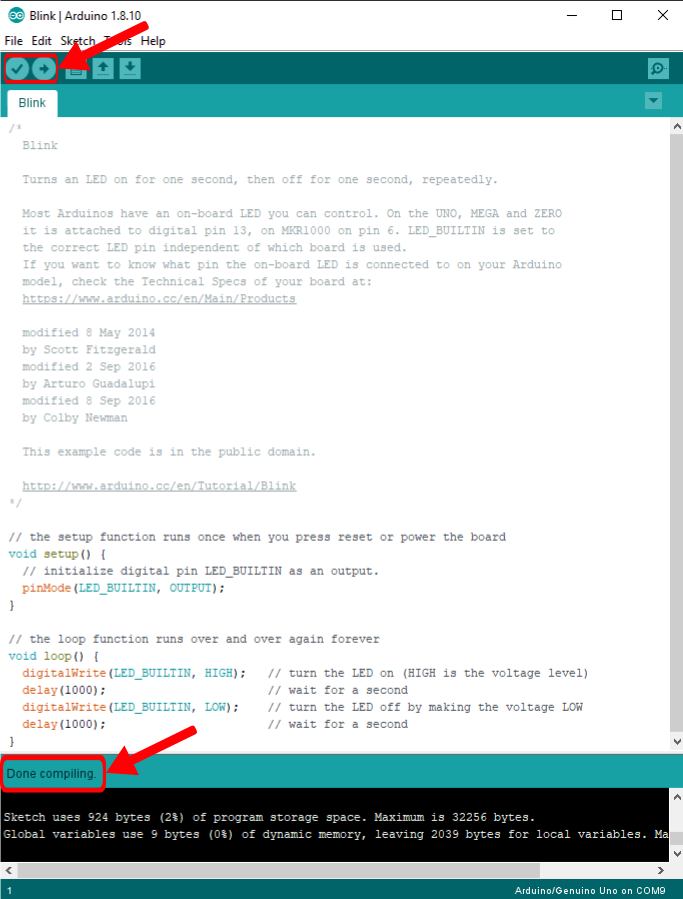
Once the example is open, go ahead and click the verify button in the top right to compile our code. Since this is the Arduino example code it shouldn’t contain any errors. We should get a message that says “Done compiling.” with no orange error messages in the bottom text box. Then select the upload button to upload the code onto the board. If successful there should be a little blinking LED on the Arduino.
Lastly let’s get the FastLED library installed. Click Tools->Manage Libraries… which will open the library search window. From here type in “fastled” and click install. This downloads some pre-written code that tells the Arduino how to interact with the WS2812b LEDs. If you ran across this guide and don’t plan on using LEDs you can safely skip this step.

To be sure the FastLed library was installed correctly, you can copy-paste this code into the window and re-upload to the Arduino. Assuming your LEDs are powered and connected to pin 2, they should light up and cycle through red, green, and blue.
#include <FastLED.h>

CRGB leds[150];

void setup()
{
  FastLED.addLeds<WS2812, 2, GRB>(leds, 150);
}

void loop()
{
  for(int i = 0; i < 150; i++)
  {
    leds[i] = CRGB(100, 0, 0);
    FastLED.show();
  }

  for(int i = 0; i < 150; i++)
  {
    leds[i] = CRGB(0, 100, 0);
    FastLED.show();
  }

  for(int i = 0; i < 150; i++)
  {
    leds[i] = CRGB(0, 0, 100);
    FastLED.show();
  }
}
With the LED blinking and FastLED library installed, the Arduino is ready for action. It is now setup for all sorts of projects including controlling individually addressable LEDs. Check out our full guide on how to create your own custom LED setup.